
I got back from Nationals with shitty front brakes, a leaky gas tank, and a bunch of new parts to play with. First, I made a couple of calls and got brake work under control.
The gas vent line was probably the easiest win, so I sourced a brass barb fitting from Lowe’s and 4′ of 3/8″ gas line from NAPA with a new plastic filter. Swapping out the brass plug for the barb was easy, and the gas line went on quickly. I brought the line up into the driver’s rear fender, gaining access through the cover behind the spare tire, and lopped off about 1′ of the hose. Capping that with the filter, I zip-tied it to the other vent hose to keep it upright and buttoned everything up. Hopefully the tank will vent a bit smoother now, at least until I can sort out the larger issue with the sender.

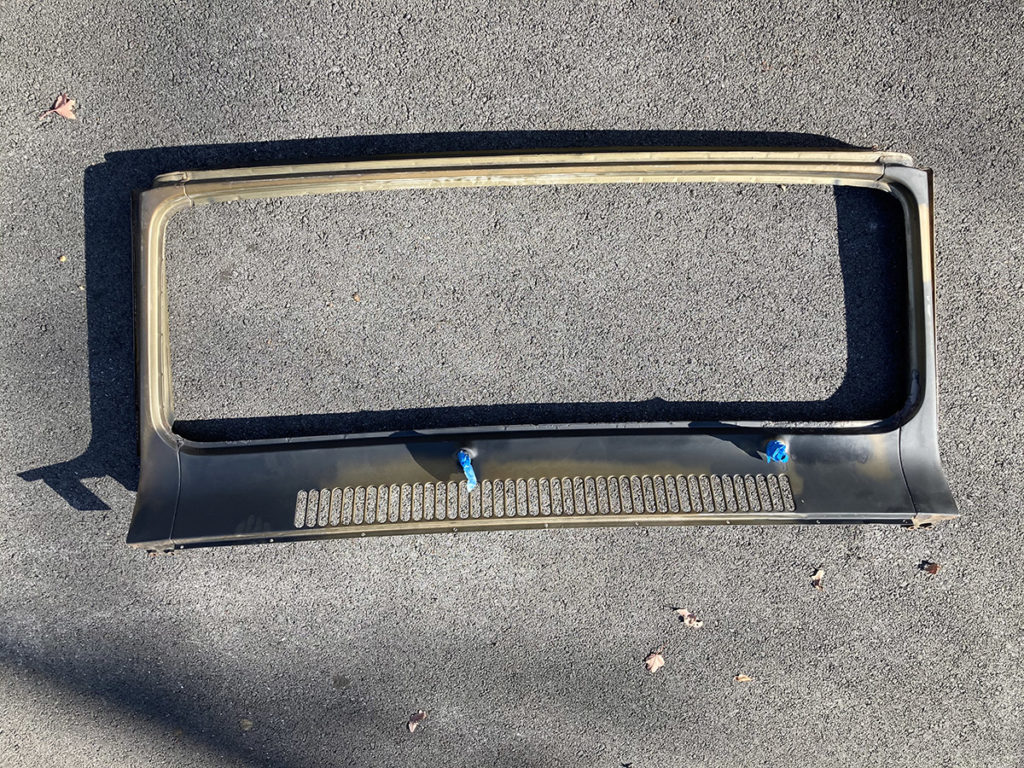
At Nats, Brian and I brainstormed a way to add snap barrels to the back of the tailgate so that I can snap the back of the soft top closed, and after I sourced the small hardware (6/32″ stainless screws and nylock nuts) I drilled into the aftermarket aluminum diamond plate. There’s a divot in the top of the tailgate that the nuts tuck into neatly without touching the sheet metal; it wasn’t until Brian pointed that out that I realized the solution was that simple. D’oh! (Now I have to get the zippers fixed).
That left the windshield wiper issue as the next big problem, which I was not looking forward to diagnosing. I also needed to re-align the wiper arms on the windshield, and a little research revealed they are simple to remove and easy to reinstall. Taking the cowl cover off confirmed my suspicion that the linkage from the motor to the wiper arm had come loose—this has happened before.
A trip to the Ace Hardware provided a quintet of e-clips in the right size, and I pulled the motor out completely to reattach the arm. Years ago I’d pulled it out and was never able to get it back in completely, so this time I focused on figuring out the secret trick of tucking the end of the bracket around the mount under the cowl. It’s now snugged tight with two bolts in the correct position. Then I had to fight to re-attach the first arm to the second linkage, which is always a treat.
With that done, I started diagnosing the wipers themselves; there is no response in the motor when I turn the switch at all. I have a 12-volt bench tester, so while the motor was out I confirmed that it’s not smoked; it revolved freely. A voltage tester hooked to the ground wire shows there’s no power coming through from the switch on the dash, so now I’m trying to pull the switch out and source a replacement.

While I was out on errands I stopped at the Harbor Freight to pick up a cheap stepped drill bit that went wider than 1″ diameter. The new glove box lockset from Binder Boneyard is a plastic barrel that’s much wider than the stock metal unit, so I had to open up the factory hole and grind off the two threaded studs on the backside of the glove box door. (Fun fact: I realized I have four spare glovebox doors when I went looking for another part in my bins).

This took all of about 15 minutes. Then I had to adjust the crappy metal tab I’d made to replace the catch on the inside of the glove box; apparently my dash is from a particularly boozy Friday shift in Fort Wayne, and does not feature the same loop catch found in all of the other Scout II’s I’ve ever seen or parted out. Once that was done and I had it fastened in the right place, the door closes snug to the dashboard and now features a lock! I’d like it a little more if it was made out of metal but for the price it can’t be beat, and anything that’s truly valuable is going to get locked into the Tuffy console or the ammo box in back anyway.

The final thing I did was to drill a single hole in the grille for my new (used) INTERNATIONAL badge, add some good 3M double-sided auto tape, and mount it to the sheetmetal in the proper position. She looks like a whole new truck!

→ This is a syndicated post from my Scout weblog. More info here.
My records say I put 925 miles on the Scout, which means it’s actually around 1187 if I do the math, but Google figures it’s about 1050. I used roughly 77.6 gallons of gas this time, which puts my mileage somewhere around 13.5 mpg—which seems a little odd. I got about 12 on the last trip, and our route was almost exactly the same.
Some various reflections:
- My front brakes are scraping. I sourced a new local mechanic who can handle brake work quickly through another Scout guy in Ellicott City, and ordered rotors and pads today. I’m going to take the Scout camping in a week and a half, so I want them working right, and I don’t have time to futz with it myself.
- This was the most rain I’ve ever driven my Scout in. We were wet for 3/4 of the trip home, but everything worked as it should have. My wipers crapped out on the second half of the way back, so I’ll have to pull the cowl and replace the motor with a known good unit. While I’m in there I have to adjust the linkage to align correctly on the window.
- The gas tank is still a pain in my ass. I was dribbling gas after every fill up. This will require several fixes: I have to buy some gas-rated hose and rig up an overflow vent with a filter at the end to vent the extra air. Jim, one of the mechanics at Super Scouts, showed me how to do this on his pretty red Travelall. Then I’ll have to drop the tank and properly seal up the sender so that it doesn’t escape out the top. I said I was going to do this two years ago.
- In the fall when the soft top comes off I need to find a sail repair service in Annapolis and see if they can sew my zippers back on. The right one gave way on Saturday night when I was closing up the truck, so now both of them are shot.
- Brian helped me think of a way to install snap barrels on the aluminum sheet overlaying the tailgate so that I can snap down the soft top; this might actually work…
→ This is a syndicated post from my Scout weblog. More info here.

Today I got a bunch of maintenance done on the Scout in preparation for the trip to Ohio. The two big things I wanted to knock out were draining and replacing the oil in the transmission and the transfer case, which had last been changed about ten years ago. The Scout has been leaking more these days. I don’t know exactly where it’s coming from, but I’ve been a little worried it’s from one of those two places, and the only way to find out was to see if they were empty or not.
I started with the transmission first, and when the drain plug came out it looked like it was pretty full and the oil was dark but not black. There were no shavings in the pan, and the end of the plug was clean—a great sign. I used a $10 pump to add 4 quarts of 50W racing oil back in. Unfortunately, the information I’d found last night was wrong: It only takes 3.5 quarts, so I spilled a pint of it on the driveway when it came back out. Great.
Next up was the transfer case, and this time I was ready for spillage. The oil in there looked about the same, and it wasn’t low. Pulling the transmission tunnel cover made it easier to pump oil back into the case from the top, even though the hose kept on wanting to pop off the pump spout after everything got slippery. I poured the old oil in a container to be recycled and stored the remainder.

When that was done I showed Finn how to loosen the bolts on top of each front shock and we added rubber bushings above the shock mount. Apparently mine had disintegrated, and Lee pointed that out last week, pulling two used bushings from his shelf and handing them to me. Then I pulled out the death wheel and chopped a length of the comically long U-bolts holding my front shocks on. Lee had recommended that simple fix—I was prepared to buy a new set of heavy-duty bolts to replace them, but had never considered just cutting them. My plan is to find some fine-thread nuts that will fit and use those to clean up the threads of the bolts in case I need to remove or adjust things.
I also got a mechanical fuel pump from Rock Auto to carry as a spare, so that got added to the expedition list and will go in the lockbox out back with the spare coil, rotor and distributor cap, wires, belts, and fluids.
I got on the phones this week and called around to find someone to help with the bearings; my search led to Erick, an old friend from my early Scout days who worked on Chewbacca. He’s in Annapolis and has the time to help get them installed next week. I’ve got a pair on order from IHPA due to arrive on Tuesday, so hopefully he can get them installed next week.
→ This is a syndicated post from my Scout weblog. More info here.
I walked out to the garage on Saturday fully expecting to fire up the Scout and go for some supplies, and…the starter barely cranked over. All the air drained out of me like a leaky pool float. Annoyed, I put the trickle charger on the battery with the cables to the truck disconnected, and took care of some housework. An hour later, it still wouldn’t crank, so I put them back on and waited two hours—with the same result. I thought I’d try swapping the old starter out for the new one in the off chance that was the issue, so I put the tow strap on the CR-V and pulled the Scout out of the garage so that I could take the tire off and have level ground to work on. I’m getting pretty fast at swapping starters out, and I’ve now added a 9mm wrench for the ignition lead to my toolkit.
That, of course, did not change anything, so I put the smaller Honda battery in the Scout and found that it fired right up.
At this point, I’ve got two possible culprits:
- There’s a parasitic drain on the battery from something that has suddenly appeared; perhaps a critter got into the wiring in the last couple of weeks.
- I mistakenly reversed the polarity of the trickle charger and messed the battery up.
Because time was of the essence, I figured I’d solve for #2 and bought another new battery, which was not a cheap solution—but I didn’t have time to chase down wiring issues with other projects waiting. Once I put the new battery in, she fired right up. I let her sit overnight and she started easily on Sunday morning, so I put about 20 miles on her running errands.


On my way, I spied a new Scout sitting at the shop up the street, so I drove up to the back lot and peeked around. He’s moved the stuff that was there and pulled in some new trucks: the thing that caught my eye at once was a beautiful, beat up Metro that I think I’ve seen online in classifieds.


There was a red Scout that looked good from one side and kind of terrible from another—minus axles, engine, and front clip, and covered in interesting speed parts stickers. The inner fenders were in really nice shape but the more I looked the sketchier it got.

Near that was a 1980 in rust-colored primer, which looked like it was in very good shape from the outside. Peeking inside showed it was a manual with bucket seats, but I didn’t see any diesel badges.
Conscious that I was trespassing, I was careful to stay away from them as much as possible, shoot some quick pictures, and then leave quietly. I figure driving a Scout up to see other Scouts means I’m not just some rando, but I don’t want to piss anyone off, and it’s not hard to find the guy in the purple Scout around here. The rest of the trip went without a hitch, and I was able to slide 4 sheets of 4’x8′ beadboard in the back, using several bits of scrap wood to make sure nothing got scratched or dented.
The plan now is to let her sit in the garage until Thursday with the new battery connected, and if she starts without a problem I’ll call this fixed. If she doesn’t, then I’ve got to pull her back out and chase down a parasitic drain, the concept of which does not fill me with joy.
→ This is a syndicated post from my Scout weblog. More info here.
One of the first things I did when I was having starting problems was to clean the contacts on the battery and then work my way through each lead to its end. After cleaning the contacts on the starter and then replacing that, I pulled the negative lead off the engine and disassembled it as much as possible to clean the leads there. Because the bare wire at the connector was frayed and green I snipped about 2″ from the end, cleaned the parts, and reconnected the lead, but it was about 1″ too short to reach the battery.
I made it out to Advance for a new negative battery cable last night and put it in with little fuss, then left the battery to charge overnight. This morning it fired right up. I pulled it out and let it idle until it was warm, then shut it down—with the cables connected—and let it sit for a few hours. When I went back out and tried it, it fired right up. Another test a few hours later got the same result. So I guess the negative battery cable just decided to crap out? Strange, but I guess it was probably 40 years old at this point. The new one is a fat 12 gauge wire, so it should be plenty strong for the load. I put it back in the garage with everything connected, and if it starts tomorrow I’m calling it fixed.
With a little time to kill this evening I put some snaps on the new (to me) tan soft top over the window posts. This follows the snaps I put in on the black top to keep things snug on the frame, and should make summer driving with the tan top a little more manageable. That top was manufactured with snaps around the bottom perimeter, but I’ve never put the bars on that go with it. Maybe I’ll give that a try this year.
→ This is a syndicated post from my Scout weblog. More info here.
So: the Scout was not starting yesterday, after having been on the trickle charger since Tuesday. I tried it first thing this morning after having been on the charger overnight, and got pretty much the same result—a chattering from the starter but not enough juice to keep it going. I started diagnosing by cleaning the contacts on the starter and all the positive wires, with no change. Then I tested the charge at the ignition wire on the starter to see if that was getting juice from the key, which it was. I pulled the battery and brought it to AutoZone to have them test it, which showed no problems. After a trip to the hardware store to buy some supplies, I rigged up a test jumper and bench-tested my two spare starters. The one that was making intermittent noise tested fine so I put the Scout up on jacks, pulled the tire, and swapped it out for the year-old unit.
Crucially, I disconnected the positive battery cable and put the battery on the trickle charger for the hour that took. After hooking it back up, the truck fired right up. I left everything in place, put the tire back on, dropped it onto the pavement, and cleaned up my tools. Then I went to start it up and move it—and had barely any juice.
So, a slow leak in the electrical system? Maybe a critter climbed up underneath on Wednesday afternoon and started munching on wires? Maybe the bulkhead connectors, which always have looked like they were blasted by Godzilla, finally melted?
The sky had turned gray around noon, and it began drizzling as I tried one last time to jump it from the Accord with no luck. So I used gravity and the gentle slope of the driveway to coast it back into the garage, disconnected the positive battery lead, and put the trickle charger on it one more time. Then I came inside and cracked a beer.
→ This is a syndicated post from my Scout weblog. More info here.
I had a little bit of time over the weekend to do some Scout stuff with the weather beginning to warm up, so I got right to it. The first thing on the docket was to bust out the sandblaster and remove the paint from a couple of parts I’d picked off the Flintstone scout: the license plate mount, the firewall bracket for the steering wheel, and the latch mechanism for the tailgate. Without remembering that I had better luck with glass bead, I used up a bunch of baking soda and got most of the old grungy paint off of the parts.

There’s a fair bit of pitting on the mount, so I wire-wheeled everything and shot it with a coat of rust encapsulator to keep it sealed tight. The entire socket needs to be replaced, so I’ll source an LED unit (or reuse one from the old swingarm setup) at some point in the future. The spring in the tailgate latch had slipped its cog so I reset that, cleaned the grime out with a wire brush, and shot it full of lithium grease.

A few things I’ve learned from using a $20 homemade sandblasting setup:
- It pays to have a pile of parts to do all at once. Setting it all up for one part is a colossal waste of time.
- A $200 blast cabinet, while pricy and bulky, looks more and more like a good investment. Healthier, too.
- Sandblasting with the right media in the right conditions is immensely satisfying.
Sunday’s project was fixing the driver’s side exhaust donut, which has been leaking for several years. I had the truck out yesterday for some errands, and what had been a low bub-bub-bub-bub last fall had progressed to the BUB-BUB-BUB-BUB of a straight-piped Harley over the winter.

This involved shooting the flange bolts with PBBlaster and letting them soak, which predictably had no result. No matter how I tried the outside bolt would not budge, which of course meant the inner bolt was never going to move. I used a small reciprocating saw to cut the outside bolt in half and then realized that the inside bolt was still snug—so I decided to leave that one alone. One copper bolt and two nuts later, the flange is snug around the manifold again. The difference is amazing: driving through Ellicott City to go pick up beer this afternoon, she purrs again; heading up the hill toward home no longer sounds like we’re beating a war drum on the march to Valhalla.

Saturday afternoon a new set of Hella fog lights appeared on the doorstep, which will require some slight modification to mount to the new bumper. I went with LED units because the wattage is lower and the draw on 45-year-old wiring and the alternator will be gentler. This kit came with black covers which I will have to swap out with OG white ones sometime in the future.
The current plan is to order a length of 2″x2″x1/4″ wall square tubing, chop that into 2″ sections, and then chop one of the walls off to make a strong, geometric C. Flipped on the side and welded to the top of the bumper, they will be mounts for the lights so that I don’t have to drill into the bumper itself. This is going to require the services of a local welder, as Brian came to pick his MIG a couple of weeks ago. (Or, I drive out to his house and we bumble our way through some booger welds ourselves). Either way I’m dying to get it moving along so that I can mount it. I’m still on the fence about whether I should powder-coat or just shoot it with rattlecan black here in the driveway. The paint on the rear bumper has held up really well in the nine years since I painted it; I do like inexpensive solutions…
And in the RockAuto cart this afternoon:
- A new temperature sensor—suddenly the gauge is reading zero, and I’d like to have a firm idea of how hot things get this summer. I put a laser thermometer on the water neck and it read 165˚, which means the thermostat is doing exactly what it should be.
- An air cleaner intake hose to replace the chewed up dryer hose POS I’ve had in this engine since I got it.
→ This is a syndicated post from my Scout weblog. More info here.

I’ve had a spare 345 engine sitting in the garage since 2013 that I got from Brian when he moved from his townhome. It’s been sitting on a wooden cradle since then, quietly waiting for me to do something with it. I’ve moved it here and there as I’ve rearranged things, but I haven’t really done much thinking about it until this fall. I’ve been watching a lot of revival videos on YouTube—mechanics find a car out in the woods or in a field and see if they can get it to turn over and run with a limited set of tools. I’m weird but it’s fascinating. I’ve learned a lot, and there’s something that comes up over and over again, and it usually has to do with how the engine was left: if it was running, even poorly, but with proper lubrication, there’s a good chance they’ll get it running again.
I don’t know much about this engine other than what Brian had heard from the guy he bought it from: it was low mileage and running smoothly when it came out, and I know Brian had put some oil in it to protect it from the elements—he’d been storing it in a shed behind his house. But it finally dawned on me that I needed to do some long-term preventative storage of my own.

So today I picked up some Marvel Mystery Oil, set up a space heater, and started pulling the plugs, starting with the driver’s side rear. The first plug (#8) I pulled was the worst. There was some rust around the inside collar, which got me scared the whole thing was locked up tight, but as I made my way through the others, they all looked clean. Everything was easy to pull out so the whole job was done in about 15 minutes. I used about half the bottle of MMO across the whole engine, and hopefully that will help keep things as loose as possible. When that was done I went through the box of parts Brian left with me and screwed both valve covers down so they’re not sitting loose. I hadn’t realized this but both of them have filler holes.

There’s a lot that can be done with this engine while it sits, and I’d like to tear through it a bit more to see how things work. I also want to sandblast the valley pan and other accessories and get it cleaned up to be wrapped tight in plastic.
But first, I’m going to spring for a proper engine stand at Harbor Freight and reinforce the back corner floor of the garage. I’ve been thinking about how to maximize space in there, looking at maybe buying a prebuilt shed to store the lawnmower, hand tools and other garden supplies, but that’s cash I don’t have on hand right now, so I have to make the best of what’s there.
→ This is a syndicated post from my Scout weblog. More info here.
I had a couple of days over the holiday weekend to do not much of anything and decided to get out of the house and get my hands dirty. The first thing I wanted to tackle was the inner fender and windshield frame I’d sanded a couple of weeks ago, which were sitting in my not-so-dry garage waiting to be sealed up. I wire-brushed the surface rust off of the frame and covered the bare metal with Eastwood rust encapsulator.
Then I hit the inner fender with the brush and cleaned up some more of the bad rust. It too got sealed, and overall it doesn’t look too bad. When it was dry I hauled it back up into the attic to stay out of the way.

Then I pulled my old roof racks down from the rafters and disassembled both completely. One bar was bent from a mishap on the old Jeep so I straightened that out, and looked over the steel mounting clips. All four were covered in equal amounts of Siam Yellow, Chewbacca’s old color, and surface rust, so I wire-wheeled and hit them with some primer. After a trip to Lowe’s for new hardware, I painted the clips black and reassembled both bars. I’d forgotten that Chewbacca’s old top did not have a factory rack. These aftermarket bars are just low enough that they won’t clear the top of the OEM rack so I scooted them forward and backward to clear everything and tightened them all down.

Looking through the Interwebs for local spare parts, I came across an ad for a guy building and selling bumpers up in Pennsylvania. He calls the outfit Affordable Offroad and he has a prerunner-style front bumper for $280 (additional options push the cost up to $320). Overall it doesn’t look too bad, and would be a good-looking upgrade to the front of Peer Pressure, which is a little bland.
The other thing I’m looking at is 16″ replacement wheels that are an inch wider in diameter than the current wheels—where the selection of narrower tires is wider. Summit carries a Coker 5×5.5 16″ steel rim, the look of which I like a lot, for a little over $100/each. There’s no reason to jump on this now, but it’s food for thought in the next five years.
→ This is a syndicated post from my Scout weblog. More info here.
I spend most of my week sitting at my desk in front of a computer, so the last thing I feel like doing on the weekend is being indoors. This weekend was unseasonably warm in Maryland for November, so I took full advantage and worked in the yard for most of Saturday. In the afternoon I pulled both of my spare inner fenders down from the attic in the garage and looked them over. Neither one is in excellent shape, but some close inspection showed just what condition they were in.

The passenger side is the worst. There’s a lot of surface rust over everything, and it’s pretty crispy down around the wheel well—to the point where I wouldn’t be able to save the lower half if I tried. I’d have to cut out the bottom half and weld in new steel—but the whole section is made up of a compound curve with several mounting points that I’d never be able to mimic.


The driver’s side is in much better shape, but there are a few places where it’s rusted through completely. I put the wire brush on it and got a lot of the surface rust off, and then used the DA sander to go at some of the smaller sections. It’s pretty clear that I’m going to need some POR-15 or another rust encapsulator to seal the stuff I’ve sanded to this point, but there’s a lot more to be done on this section before I call it done. I’ll most likely just put the passenger side back up into the attic where it’s out of the way.
On Sunday it was still warm, so I decided that I was tired of the dead lights in the dashboard and decided to tear things down to fix it. I pulled the dashpad and the fascia plate over the radio off and got into the back of the gauges. It’s pretty easy to pull the sockets out but it’s much harder to get them back in place; I wound up having to pull the hose off the defrost vent in order to get behind the speedo and then I was able to get the three bulbs on top of that gauge out. I used my 12-volt tester to check socket/bulb combinations before I replaced them with LEDs; all of this took much longer than it sounds like it did.

After the sun went down I tested it out, and I can see the speedo again, and it’s clear! The LED bulbs have a bluish cast to them that I’m not thrilled with, but I’ll take what I can get until I have to get in there again—because the bulbs in the secondary gauges aren’t lighting up at all. I did forget to check both the 4wD and the hi-beam indicator, so I’ll have to do that tomorrow.
→ This is a syndicated post from my Scout weblog. More info here.