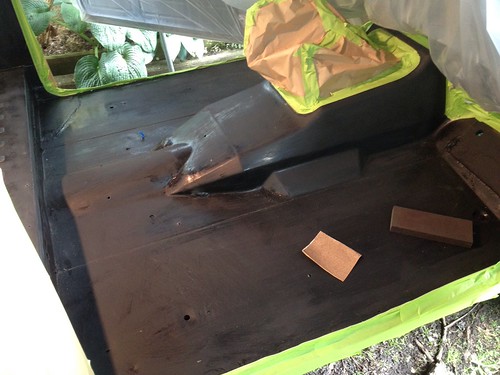
I’ve had the liner in for a total of two weeks, and here’s my report.
- Don’t let it get too old. I’ve had this kit sitting in a climate-controlled cool, dark corner for two (three?) years while I got my act together to spray it in. In that time, the primer hardened to a solid in the bottles, the main component skinned over about 1/2″, and the black activator component looked like it was beginning to go bad. The folks at Al’s were very helpful and suggested I buy more activator when I ordered replacement primer. When I got the order they even threw in a spraycan of mold release, which helped when cleaning the spray gun out (the excess basically peels right out).
- Mix it really well. I used the mixing attachment they supplied with the kit, which probably works fine for brand-new materials, but I could have used something with a wider paddle to really get things mixed well. I sprayed the primer on the bed as instructed and then mixed the first batch of liner. When I test-shot it on some spare door panels, I got a white foam for the first 30 seconds or so and then the liner started coming out–some of the C component may have been bad as well. This was after 5 minutes of mixing. My liner looks good but there are little boogers here and there where the main component hadn’t dissolved all the way, and they’re still sticky.
- Dial the pressure in early. The pressure on my compressor was set very low to begin with (around their recommendation) and I got a very thick, gloopy spray at first. It was so bad that I was getting random puddles in different areas as I tried to clear the nozzle. I shot about 1/2 the hopper worth of liner before I got wise and increased the pressure, and at that point the spray went on smoother. I’d also recommend having a thick-nap roller handy to smooth out the puddles; I wasn’t thinking ahead that far but in hindsight it would have made a big difference.
So it’s in; I’m relatively happy with the results but I wish I’d had more time to experiment with the compressor and think through the application.
→ This is a syndicated post from my Scout weblog. More info here.
Sunday morning I got up early, helped get Finn fed, and then hustled outside to get to work. Brian T. drove all the way out from Chestertown with his compressor and we sanded, scuffed, cleaned and taped off the whole truck. As I was finishing up some final scuffing, Brian looked up from the liner kit and said, “I think we have a problem.” Al’s Liner is a 3-part system, the first of which is an adhesion primer that came in a plastic bottle. My cursory check of the kit last week failed to reveal it had frozen solid after two years in storage. Being a specialty kit, nobody open on Sunday has it in stock, and all the other commercial liners are 2-part systems. Grudgingly, we wrapped everything up under plastic. I’ll call first thing tomorrow and see if they can overnight me a new bottle, in which case I’m going to try and shoot it on one night this week. I hooked up a trio of lights under the tent that should provide enough coverage to see the whole thing.
After everyone took off, I took Finn swimming in the neighbors’ pool and drank a beer to cool off.
Many thanks to everyone for their help this weekend- both Brians went above and beyond and I never would have made it this far without their help.
→ This is a syndicated post from my Scout weblog. More info here.
A few months ago, I took off a Friday from work so that I could put in a three-day weekend installing bedliner on the Scout. With the help of some excellent friends and a lot of hard work, I got it very close to completion.
Friday morning I pulled the truck out and attacked it with sanding discs. Much of the paint on the bed came off quickly and easily. Both front seats came out as easy as the day they were installed, which was shocking. I’d replaced all the rollbar hardware with Grade 8 bolts, so I knew that would come out without a problem. I’m going to have to use a ratchet strap to pull the feet together just a hair before it goes back in; the mounting plates scuffed the paint on the walls when I pulled it out.
As I got closer to the front, the PO’s paint job got thicker so the going got slower.
This is what I found when I ground the bolts off the metal strip holding the weatherstripping down. There was carpeting underneath, which leads me to believe these had never been taken off before. I ground the bolts down to the floor and cleaned out each hole with the vacuum.
After Brian H. came by, he dug in and helped me make short work of the front floor and the remainder of the tub:
Once the paint was off, we used Marine Clean and Metal Ready to prep the bed, and then rolled it into the sun to dry out. Then it was time to paint:
Here’s where we ended up at 7PM this evening. If Brian hadn’t come over, I definitely wouldn’t have gotten this far.
→ This is a syndicated post from my Scout weblog. More info here.


